The humble gift card just got way more usable for Shopify merchants.

Breaking down the basics of the new gift card recipient form included in Dawn.
Back in March of last year, Shopify added a pretty long-awaited feature to their Dawn theme code base: the ability to send a gift card to someone other than the person buying it. Revolutionary idea.
I can't tell you how many times I have had to painfully explain to a client that they will need an app to do anything beyond the embarrassingly slim, out-of-the-box "feature".
So this was sorely needed. But since then, I haven't thought much about it until an update just a few of weeks ago that introduced scheduling. Very, very slick. And a perfect excuse to re-visit this with a deep dive.
What Dawn includes as of 12.0.0
So here's a link to the snippet as it is in Dawn v12.0.0: https://github.com/Shopify/dawn/blob/main/snippets/gift-card-recipient-form.liquid
And here's what it looks like with Dawn:
There is a lot here, and it's all relevant if you are working with a Dawn-based theme. But let's boil it down to its essence and see what we need to copy if we want to include something similar for our clients.
Peeling back the layers
First, let's pull out only the actual form elements, since that's the secret sauce.
Here that is with classes, labels, error handling, etc. all removed:
<!-- Captain Obvious Comment: I don't really need to tell you that this is horrible UI, but I feel the need to explain that this horrible UI is horrible on purpose. In the real world you will need labels and error handling. -->

<input
  name="properties[__shopify_send_gift_card_to_recipient]"
  id="Recipient-checkbox-{{ section.id }}"
  type="checkbox"
  disabled
>
<input
  name="properties[Recipient email]"
  id="Recipient-email-{{ section.id }}"
  type="email"
  value="{{ form.email }}"
>
<input
  name="properties[Recipient name]"
  autocomplete="name"
  type="text"
  id="Recipient-name-{{ section.id }}"
  value="{{ form.name }}"
>
<textarea
  name="properties[Message]"
  rows="10"
  id="Recipient-message-{{ section.id }}"
></textarea>
<input
  name="properties[Send on]"
  autocomplete="send_on"
  type="date"
  id="Recipient-send-on-{{ section.id }}"
  pattern="\d{4}-\d{2}-\d{2}"
  value="{{ form.send_on }}"
>
<input
  name="properties[__shopify_send_gift_card_to_recipient]"
  type="hidden"
  value="if_present"
  id="Recipient-control-{{ section.id }}"
>
<input
  name="properties[__shopify_offset]"
  type="hidden"
  value=""
  id="Recipient-timezone-offset-{{ section.id }}"
  disabled
>
A couple of notes here:
- The
properties[]values in thenameattributes are the key (no pun intended). These are what actually hook everything up in the back end and ensure the gift card is delivered as intended. - Some of these
inputs are going to look redundant, but it's all necessary. - Depending on how your product form is structured, you may need to hook up these inputs to a specific
form. If you're using a standard form like I am, you just need these inputs to be inside your{% form %}Liquid tag or you need to add aformattribute to each of the inputs.
Our product.json template has a single custom-liquid section that is rendering a product-form snippet which has the following code:
{% form 'product', product %}
  <select name="id">
    {% for variant in product.variants %}
      <option
        value="{{ variant.id }}"
        {% if variant == product.selected_or_first_available_variant %}
          selected="selected"
        {% endif %}
      >
        {{ variant.title }} - {{ variant.price | money }}
      </option>
    {% endfor %}
  </select>
  {% if product.gift_card? %}
    {% render 'gift-form' %}
  {% endif %}
  <input type="submit" value="Add to cart">
{% endform %}
That's the bare minimum for rendering a working product form.
Inside that snippet, we are rendering our gift-form snippet which is literally just the form elements I listed in the code block above, plucked from Dawn and stripped of anything superfluous.
Here is what that looks like on the page:

Submitting that form results in my bare bones cart page:

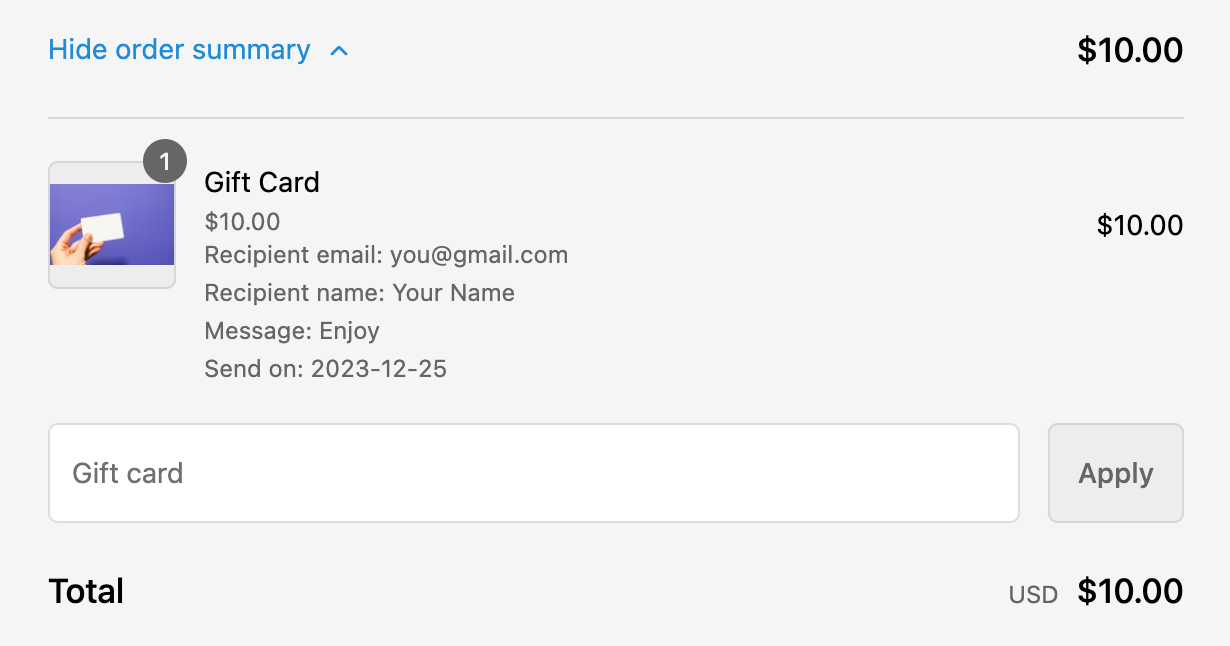
Which is passes through to checkout like so:

What happens after the purchase?
Once the order is placed, the customer receives a typical order confirmation email, as well as the "Gift card receipt" notification email.
The recipient (as defined in the "Recipient email" field) receives the "New gift card" notification email.
(I have tested this and it does indeed deliver on the date you select.)
Wrapping up the gift (card)
It really is cool what you can do with just some simple Liquid and HTML.
I even have a neat idea of how you might be able to present different image options to the customer, pass that image URL to as a hidden property, and then use that property to show that custom image in the recipient email. 😎
An idea for another post...
I hope this was helpful, and happy holidays!

